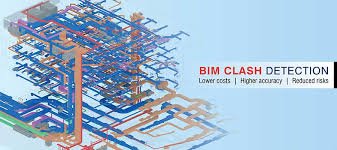
Structural engineers create, manage, and update designs on a daily basis. Coordinating design models and drawings while maintaining quality is a daily challenge for structural engineers. With this in mind, Engisoft Engineering Has investigated a linked Structural BIM workflow between Revit, Robot Structural Analysis (RSA), and Advance Steel to assist Structural Engineers with their modeling efforts for drawings, analysis, and fabrication details. Let’s get into structural workflow design to fabrication–
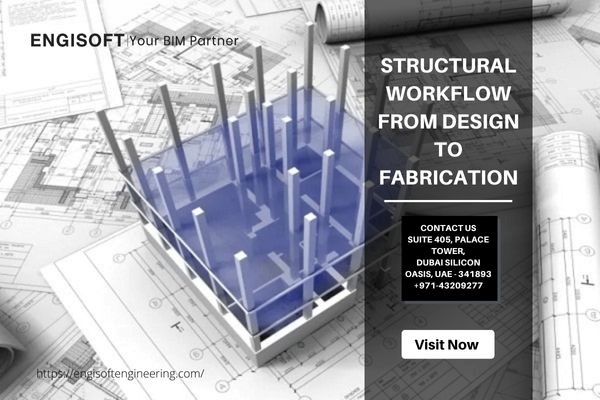
Structural Design to Fabrication Workflow
Adding Start, End, and Boundary Conditions
- In Revit, open the Structural Model.
- To enable the Analytical Model Categories in the view, open the Graphics Overrides dialogue and click Apply.
- Select the ‘Column’ from the A-7 grid section in the 3D view. Right-click it and choose ‘Select All Instances,’ then choose ‘In Entire Project’ from the submenu.
- Then, from the drop-down menu, select ‘Analytical Columns.’
- Go to the ‘Properties’ menu and select the ‘Fixed’ option for the ‘Base Release’ and ‘Top Release’.
- The previous four steps should be repeated for Grid D, Rafters, Main Beams, and so on.
- Repeat steps 3, 4, 5, and 6 for purlins, but this time select the ‘Pinned’ option.
- Select ‘Front view’ from the view section in the Analytical Model view. Then choose ‘Vertical Braces’ from the right side of the view using the selection from bottom-right to top-left.
- Rep the previous step for the Horizontal Braces.
- Navigate to the 3D view, then Save and Close the project.
- Then Open Revit and open the file.
- Select the ‘Boundary Conditions’ icon in the ‘Analytical Model’ view and open the ‘Analyze’ tab.
- Select ‘Point’ as the Boundary Conditions Type and the ‘Fixed’ state from the properties drop-down menu. Click the ‘Apply’ button.
- Click on the bottom of each Column analytical Node from Grids in the canvas. After that, press ‘Esc’.
- Navigate to the Structural Plan and select the ‘Base’ view. Enable the Analytical Model Categories in this view by opening the ‘Visibility or Graphics Overrides’ dialog. Turn on the ‘Analytical Nodes’ category, then click ‘Apply,’ then ‘OK.’
- Zoom in to see the Grid. The previous three steps should be repeated to set the boundary conditions.
- Finally, switch to the ‘3D View,’ save, and close the project.
Adding Load Information
- Launch Revit and open the file.
- Navigate to the ‘Analytical Model’ view and select the ‘Analyze’ tab. Choose the ‘Load Cases’ icon.
- Make load cases: Dead load, MEP load, snow load, and wind load are all examples of loads.
- Create Line Loads on the Analytical Model for each Load Case and include the details in the properties menu, such as Orient too, Uniform Load, Project Load, Forces, Moments, Identify Data, and so on.
- Inside Canva, click the ‘Loads’ icon, then the Hosted Line Load command. Select the appropriate Load Case and place of value by clicking on the properties. Select each column, purlin, or grid from the canvas by clicking Apply. After you’ve finished your selection, press Esc.
- Inside the Structural Setting, select ‘Load Combination’ and add three Load Combinations and an Envelope.
Analyze the Structural Model
- Open the ‘Analytical Model’ view, click the ‘Analyze’ tab, and then choose ‘Robot Structural Analysis’ from the drop-down menu. Then, on the ‘Robot Structural Analysis Link,’ click.
- Click the ‘Send Options’ button in the dialog that appears.
- Verify and select the ‘DL’ case with self-weight in the option. To save, click ‘OK.’
- Select ‘Direct integration’ in the type of integration and click ‘Send model’ in the direction of integration with Autodesk Robot Structural Analysis.
- The Revit model will be imported into the Robot Structural Analysis software. On the taskbar, select the ‘Calculations’ command.
- The calculation will be performed by the robot and reflected in the ‘Calculations Messages’.
- Click on the Revit icon in the taskbar to bring up the Revit model. Then, from the ‘Analyze’ tab, select the ‘Robot Structural Analysis Link’ from the ‘Robot Structural Analysis’ drop-down menu.
- Update the calculation results in the dialog box that appears by selecting the ‘Update model and results’ and ‘Direct integration’ options. Then, by clicking ‘OK,’ import the analysis results from Robot.
- Uncheck the ‘Required reinforcement results package’ option in the following dialog box.
- Open the ‘Visibility/Graphics Overrides’ menu in the ‘Analytical Model’ view, select the Analytical Model Categories, and un-select the ‘Structural Loads’ category. Select ‘Apply’ and then ‘OK.’
- Click the ‘Results Explorer’ button from the ‘Analyze’ tab.View the Analytical model dialog results by selecting the load case, and for member results, select the ‘Moments My’ option. Click the ‘Apply’ button. The model will fill up the moment diagrams on the strong axis of the beams for load combination in this step.
- Uncheck the ‘Moments My’ option and click ‘Apply’ to remove yourself from the model.
- Can choose a rafter and a column in the canvas, then select the ‘Moments My’ option and press Apply. Only the selected elements’ moment diagrams will be displayed.
- Close and save the project.
Propagating Steel Connections
- Navigate to the ‘Steel’ tab in the 3D view and select the ‘Connection’ command.
- Edit the ‘Type Parameters’ of the Base Plate connection. Click ‘OK,’ and then save your changes.
- To propagate the Baseplate in the project, select the ‘Base Plate’ connection, right-click on it, and then choose the ‘Propagate Connection’ command from the contextual menu. This command will propagate the connection type to all columns in the model with the same section and geometrical position.
- Similarly, repeat steps 3 and 4 to propagate the Moment End Plate in the model.
- Make the Double Purlin Splice Plate connection, then propagate it throughout the project.
- Close and save the project.
Transferring the model to Advance Steel
- Launch Revit and open the file.
- Select the ‘Advance Steel Extension’ from the ‘Add-Ins’ tab and click the ‘Settings’ button.
- Add the location of the families to the settings menu.
- Check the options for ‘Exports grid’ and ‘Ignore beam cutbacks and extensions on export’.
- Click the ‘Export’ button in the ‘Advance Steel Extension’ drop-down menu.
- The exported file should be saved.
- Select the ‘ASTemplate.dwt’ from the ‘Advance Steel 2021’ US Version.
- In a new drawing, import the Revit file from the ‘Export & Import’ tab.
- Save and exit the file.
Creating Detail Drawings
- In Advance Steel, open the file.
- Select ‘Numbering’ from the ‘Output’ tab. Within it, use Drawing Processes to produce Single Part and Assembly drawings.
- To open, view, and select the detailed drawings for the ‘Output’ tab, use ‘Document Manager.’ Select the detail drawings and then click the ‘Add to batch plot’ button. This action will duplicate the detail drawing in a different category. Choose a plotter by right-clicking on ‘Batch plot’.
- Select ‘PDF’ in the ‘Plot Device’ field and click ‘OK.’ By right-clicking on the batch plot, you can also print it. The detailed drawings will be printed in PDF and saved alongside the DWG model.
- Select the detail drawings in ‘Document Manager,’ then click ‘Add to explode.’ Detail drawings are copied to a new category called ‘Batch explode,’ and you can select ‘Set-up the explode options,’ and choose the version of the dwg files that will be created, as well as the layer, color, and line type to which element will be exported.
- To generate NC files, go to the ‘Output’ tab and select the ‘NC’ command.
- To generate DXF files, go to the ‘Output’ tab and select the ‘DXF (All objects)’ command.
FAQ
Which is the most recent method of structural designing?
Ultimate load method (ULM)
What is an example of structural design?
Tall buildings, bridges, dams, towers, offshore platforms, stadiums, retaining walls, and foundations are all examples of structures.
What are the basics of structural design?
For the design of any structure, there are five basic steps that must be taken. modeling, load analysis, structural analysis, structural design, and detailing are the steps involved.
What is the design process in structural design?
Structural design is the art and science of comprehending the behavior of structural members subjected to loads and designing them with economy and elegance in order to provide a safe, serviceable, and long-lasting structure.
Why structural design is important?
Structural design includes all of the necessary information about foundations, walls, floors, roof types, steep beams, material quality, and other factors to ensure that the structure is safe and sound.
What is the aim of structural design?
The goals of structural design are to create structures that are stable, strong, and serviceable. It must also be economical and aesthetically pleasing.